Baking sourdough scones is an adventure full of flavor, texture, and creativity. This article will guide you step-by-step through the process of crafting the perfect sourdough scones recipe. Whether you’re a seasoned baker or a curious beginner, this guide covers everything from ingredients and tools to baking tips and FAQs. Let’s dive into the first part!
Introduction
What Are Sourdough Scones?
Sourdough scones are a delectable twist on the classic scone, incorporating the tangy and rich flavor of a sourdough starter. They’re tender, buttery, and perfect for breakfast, tea time, or as a snack. Unlike traditional scones, sourdough adds a distinct depth of flavor, making them an irresistible treat.
Why Use Sourdough for Scones?
Using sourdough discard or an active starter not only enhances the taste but also helps reduce food waste. The fermentation process in sourdough promotes better digestion and creates a naturally airy texture. Plus, baking with sourdough is a fun and rewarding experience that connects you with the age-old art of fermentation.
The Appeal of Sourdough Baking
Baking with sourdough isn’t just about the flavor—it’s about the process. It allows you to experiment with new techniques, enjoy the therapeutic nature of baking, and create something truly homemade. Whether sweet or savory, sourdough scones are versatile enough to suit any palate.
Ingredients and Tools for Sourdough Scones
Essential Ingredients for Sourdough Scones

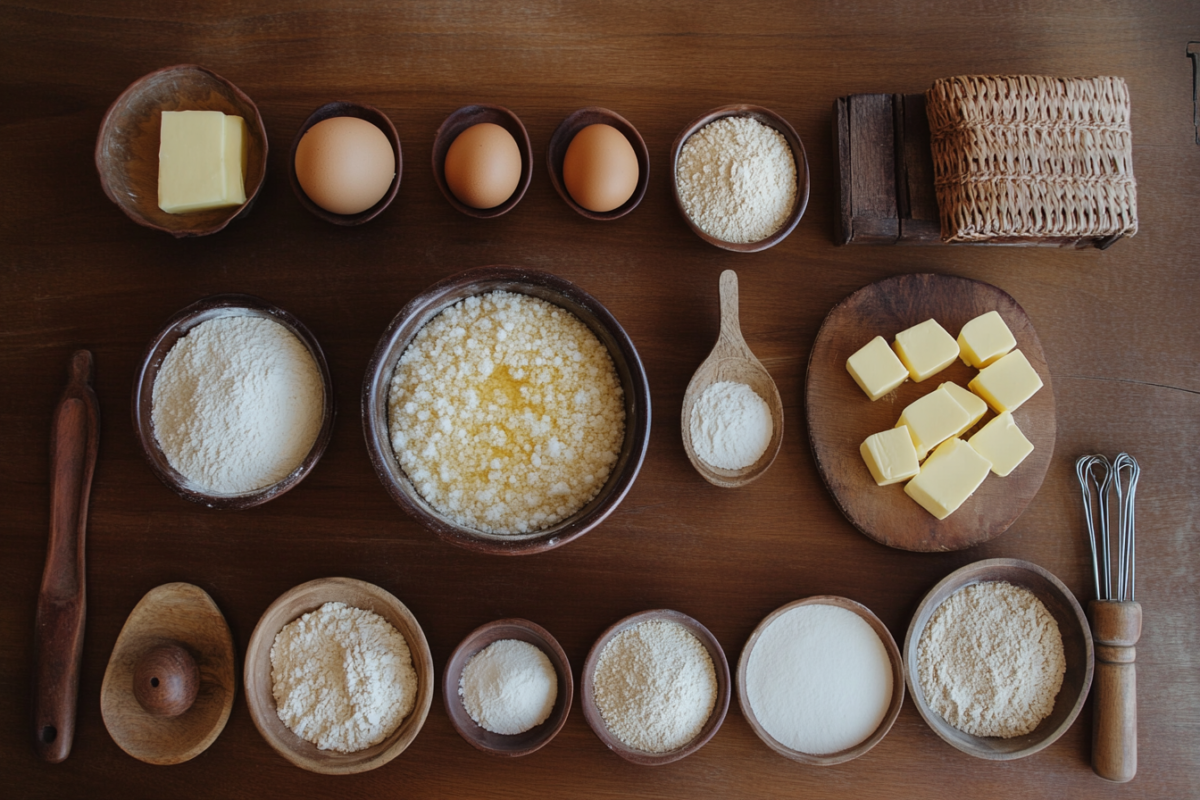
To create fluffy sourdough scones, the right ingredients are key. Here’s a breakdown of the essentials:
- All-purpose flour: This is the backbone of your scones. A good quality all-purpose flour helps achieve that delicate, crumbly texture we all love. You can even experiment with a bit of whole wheat flour for a nuttier flavor, but keep the majority of it all-purpose for softness.
- Sourdough starter: Your sourdough starter is the secret ingredient. Whether you use a discard or an active starter, it adds the signature tang and contributes to the scone’s lightness. If you’re using discard, it’s a great way to make something delicious while using up leftovers.
- Butter: Butter is essential for that flaky, tender crumb. Make sure it’s cold and cut into small cubes before incorporating it into the dough. This will help form those perfect layers.
- Sugar: A touch of sugar sweetens the dough just enough. You can use granulated sugar, but brown sugar adds a slight depth of flavor.
- Additional flavors: You can add in extras like dried fruits (raisins, currants), chocolate chips, or even fresh herbs like rosemary. Customize your scones to match your preferences or the season!
Tips on Choosing High-Quality Ingredients
When selecting your ingredients, opt for fresh, high-quality options. Fresh butter, a well-fed sourdough starter, and unbleached flour will make a noticeable difference in your scones. If you can, buy organic or locally sourced products for the best flavor and texture.
External Link Reference: Not sure how to maintain your sourdough starter? Learn more about feeding and maintaining your sourdough starter.
Tools and Equipment for Sourdough Scones
The right tools are crucial for making perfect sourdough scones. Here’s a list of what you’ll need:
- Mixing bowls: A large mixing bowl is essential for combining your dry and wet ingredients. If you’re making a double batch, you’ll need an even bigger one. A smaller bowl can be used for mixing your sourdough starter and any liquid ingredients.
- Pastry cutter or food processor: To incorporate the cold butter into the flour, use a pastry cutter, two knives, or a food processor. This ensures the butter stays in small, pea-sized pieces—key for a flaky scone.
- Rolling pin: While not always necessary, a rolling pin helps you flatten the dough to an even thickness, giving you uniform scones. Alternatively, you can use your hands to gently pat it down.
- Baking sheet and parchment paper: A non-stick baking sheet lined with parchment paper makes transferring your scones to the oven a breeze and keeps them from sticking.
- Cookie or scone cutter: For uniform scones, a round cutter works best. If you prefer square scones, you can simply cut the dough into squares with a knife.
Why These Tools Matter for Perfect Scones
The tools you use can directly affect the texture and appearance of your scones. For example, using a pastry cutter to blend the butter into the flour ensures you get the perfect flaky layers. Also, using a sharp cookie cutter (rather than just pinching off dough) ensures clean edges, which bake more evenly.
How to Make Sourdough Scones: Step-by-Step Guide
Preparing the Sourdough Starter
Before you even think about mixing your dough, you’ll need to make sure your sourdough starter is in good shape. The best type of starter to use is one that’s active and well-fed. If you’re using a sourdough discard, ensure it’s been refreshed recently. A discard that’s too old or unfed can make your scones dense and flat.
To refresh your starter, feed it with equal parts water and flour (usually 1:1:1 ratio by weight), and let it sit at room temperature for about 4-6 hours, or until it’s bubbly and has a pleasant tang. If you’re in a rush, you can even use your starter right away, but a well-fed starter will always yield better results, providing that airy, tender texture and that lovely flavor you’re looking for in your scones.
Mixing the Dough
Once your starter is ready, it’s time to mix the dough. Here’s how you can do it step by step:
- Combine dry ingredients: In a large mixing bowl, whisk together the all-purpose flour, sugar, and a pinch of salt. This ensures that your dry ingredients are evenly distributed before adding wet ingredients.
- Add cold butter: Cube the cold butter and add it to the flour mixture. Using a pastry cutter, or your hands, quickly incorporate the butter into the flour. The goal is to keep the butter in small, pea-sized pieces. This will create those flaky layers in your scones.
- Add sourdough starter: Make a well in the center of the dry ingredients and pour in your sourdough starter (plus a bit of milk or buttermilk, depending on the recipe). Gently stir everything together until the dough just comes together. Don’t overmix! Overworking the dough can lead to tough scones, and nobody wants that.

Common Mistakes to Avoid During Mixing
- Don’t overwork the dough: The more you handle it, the tougher the scones will be. Mix until everything just comes together.
- Use cold butter: If your butter warms up too much during mixing, you won’t get those tender, flaky layers.
- Don’t add too much liquid: If the dough feels too sticky, add a touch of flour instead of dumping in more liquid.
Shaping and Cutting the Dough
Once your dough is mixed, it’s time to shape it into scones. This part is crucial for ensuring that your scones bake evenly and have a nice texture.
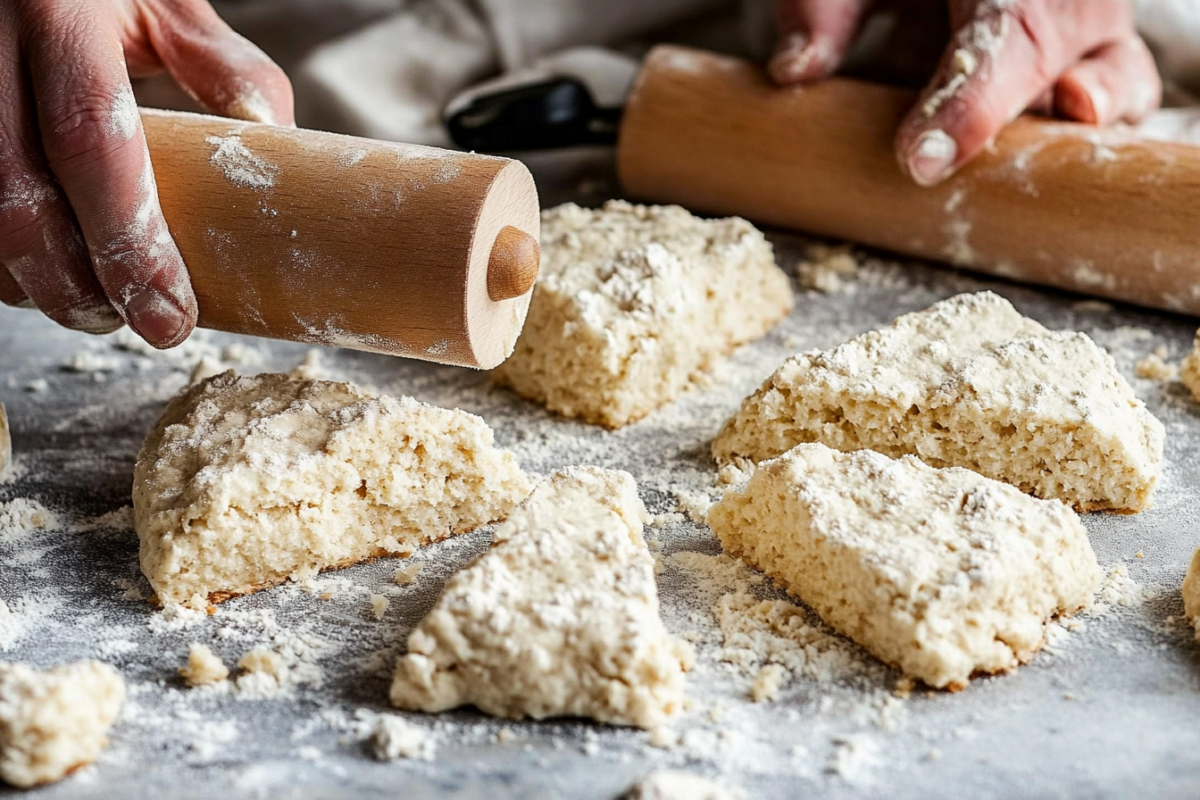
- Flour your surface: Lightly flour your work surface before placing the dough on it. Gently pat it down into a disc or rectangle shape, about 1-inch thick. Don’t use a rolling pin if you can avoid it—this will keep your dough light and airy.
- Cut into rounds or wedges: Using a sharp scone cutter (or even a glass), press down to cut out circles of dough. Alternatively, you can use a sharp knife to cut the dough into wedges if you prefer a more rustic look. If you’re making round scones, don’t twist the cutter when you press it down—this can cause uneven rising.
- Transfer to baking sheet: Place your scones onto a lined baking sheet. You can brush the tops with a little cream or milk for a golden finish.
Baking the Scones
Now that your scones are shaped and ready, it’s time to bake them to perfection.
- Preheat your oven: Preheat your oven to 425°F (220°C) for a hot and quick bake. This high temperature ensures the scones rise beautifully and get that golden-brown crust.
- Bake the scones: Place the scones in the oven and bake for 12-15 minutes. Keep a close eye on them during the last few minutes. They should be lightly golden on top, with a firm yet soft texture when you gently tap the top. If you’re unsure, insert a toothpick into the center—if it comes out clean, they’re done!
- Cool and serve: Allow the scones to cool for a few minutes before serving. Enjoy them warm, slathered with butter, jam, or even whipped cream for an indulgent treat.
Tips for Perfect Sourdough Scones
Troubleshooting Common Issues
Even the best bakers run into problems from time to time. Here’s how to solve some common issues you might encounter with your sourdough scones:
- Dry dough: If your dough feels too dry, don’t panic! Simply add a tablespoon of milk or water at a time, gently mixing it in. However, be careful not to add too much liquid, as it can make the dough too sticky. The dough should feel firm but slightly tacky.
- Dense scones: Dense scones are often caused by overmixing the dough or using a sourdough starter that isn’t active enough. Remember, the key is to handle the dough as little as possible and use a well-fed, bubbly starter. If your scones still turn out dense, try adjusting the baking time or temperature slightly.
- Uneven baking: If your scones bake unevenly, this could be due to the placement in the oven. Try rotating your baking sheet halfway through the baking time, especially if your oven has hot spots. Also, make sure the scones are spaced out so that air can circulate around them.
Flavor Enhancements and Variations
While the classic sourdough scones are delicious on their own, you can easily make them your own with a few simple flavor enhancements:
- Sweet variations: Add chocolate chips, dried cranberries, or raisins for a sweet touch. These additions pair beautifully with the tang of the sourdough starter, making for a perfectly balanced treat. You can also mix in citrus zest like orange or lemon for a bright, refreshing twist.
- Savory options: Want something a bit more savory? Try adding cheddar cheese, chopped rosemary, or even garlic powder. These ingredients bring a rich, savory depth that’s perfect for pairing with soups or salads. The great thing about sourdough scones is their versatility—whether sweet or savory, the base recipe can handle a variety of ingredients with ease.

